Showing posts with label Brayer. Show all posts

Friday, July 26, 2013

Thanks in Mosaic

This is the second card we made at the new catalog open house.  I love this new mosiac shape!  So FUN and so trendy.  This is one of my favorite techniques with the impressions folders.  Just brayer your ink on your impressions folder, run the CS through the Big Shot as you would normally, and you have a beautiful background on your CS with color :)  Order your supplies here.
Cardstock:  Chocolate Chip, Very Vanilla, Pistachio Pudding
Ink:  Pistachio Pudding, Chocolate Chip
Stamps:  Petite Pairs
Accessories:  Big Shot, Brayer, Modern Mosaic Impressions Folder, Mosaic Punch, Scallop Trim Border Punch, Sponge

Thursday, August 1, 7 p.m. Technique Night.  Create two projects using Washi Tape.   All supplies will be provided including adhesive. Fee:  FREE—Stamp Club Members/Demonstrators; $7—Customers/Guests (FREE when you place a $40 the night of the class)  RSVP today.

Friday, August 16, 7 p.m. Stamp-a-Stack Stamp Camp.   Fifteen card designs will be available for you to create ten cards.   All supplies will be provided except adhesive.  Please bring your own.   Fee:  $20—Stamp Club Members/Demonstrators; $25—Customers/Guests ($5 when you place a $40 the night of the class)  RSVP by August 12 and receive $5 off class.

Monday, July 22, 2013

AND....I'm BACK!

AH!  Convention was AWESOME and exactly the boost I need to get going again.  Over the next few days, I'll be sharing things from Convention, but I really want to start again with the regular posting projects on the blog again.  The summer has been a wonderful one spent with my family.  After attending Convention, I'm ready to create again.  Since today is Big Shot project day, it seems only appropriate that I share one of my swaps I made at Convention.  Wouldn't you know it that I forgot to take a picture of it before I left so you get the view through the clear envelope.
Just keepin' it real!  I created this card with this card in mind.  I loved this dress in the Bermuda Bay color!  Order your supplies here.
Cardstock:  Bermuda Bay, Very Vanilla, Smoky Slate
Ink:  Bemuda Bay
Stamps:  Sweets for the Sweet
Accessories:  Big Shot, Dress Up Framelits, Chevron Impressions Folder, Brayer, Rhinestone Jewels, Silver Ribbon (available soon in the Holiday Mini :), 7/8" scallop circle punch, small oval punch, Dimensionals

Here are just a few quick things you need to know now! :)

PAPER PUMPKIN
Use the promotion code PUMPKINDEAL to join Paper Pumpkin before August 31, 2013, and pay only $10 a month (plus tax, where applicable. Shipping included!)  for the first two months.   Click here to sign up today!  Just a few details:  For new subscribers only.  Promotion applies only to the first two months of a new subscription. After receiving two month's worth, the price for each month's kit will go to the regular price: $19.95.  You must join by Saturday, August 31, 2013; 11:50 PM (MT).  Subscribe NOW! :)

UNDEFINED
Have you ever wanted a stamp but couldn't find the perfect image? Maybe you have a special family logo or a sketch you'd like to have as a stamp. Well now YOU can! Undefined is Stampin' Up!'s new stamp carving product line. You define the rubber stamp any way you want.  When you carve your very own stamp, you will have an entirely new and different creative experience. And when you're finished, you will have created a one-of-a-kind stamp!  How exactly do you carve a stamp?  Check out this video to see how awesome this new product is!  Intrigued? We know you want to get your hands on the kit and start carving your own masterpieces. Here are the item numbers you'll need (we suggest adding a refill kit on your first order . . . trust us, you're gonna want it).
Item #
Description
Price
133402
Undefined Stamp Carving Kit
$19.95
134808
Undefined Refill Kit
$9.95
124236
Clear-Mount Cling Foam*
$10.95

*Add a sheet of Clear-Mount Cling Foam to create your own clear-mount stamps. Mounting your stamps on the cling foam allows you to make stamps any size you want, not just what will fit on the blocks in the kit.
Included in the Stamp Carving Kit:
  • 2 carving tools
  • 3" x 4" rubber
  • 3" x 4" foam
  • 4 wood blocks (various sizes)
  • 1 Island Indigo Stampin' Write Marker
  • 3 postcards
  • Instruction sheet
  • Stamp image templates
Included in the Refill Kit:

  • 3" x 4" rubber
  • 3" x 4" foam
  • 4 wood blocks (various sizes)
  • Instruction sheet

RECRUITS!

New recruits get to pick one of four project kits for free in addition to their starter kit when they join Stampin' Up!  (After seeing the build a banner kits at Convention, that was the FIRST thing on my order when I got home.  You can come to my class in September for FREE when you become a DEMO!  I can't wait to add this cute decoration to my holiday decor!  Sign up before Aug. 31 for this great offer!
Kit Options:
OptionKit DescriptionItemTotal Value
1
Build a Banner Simply Created Kit AND
Halloween Banner Simply Created Accessory Kit
133507
132698
$29.90
2
Build a Banner Simply Created Kit AND
Christmas Banner Simply Created Accessory Kit
133507
132697
$29.90
3
Thankful Tablescape Simply Created Kit133463
$19.95
4
Tag a Bag Bundle AND
Tag a Box Bundle
131371
131372
$22.45

The first three project kits are from the holiday catalog and the last option is from the annual catalog.

FREE Designer Series Paper!
Buy three packs of select Designer Series Paper and get one for free!  Take advantage of this special by July 31!


Thursday, August 1, 7 p.m. Technique Night.  Create two projects using new techniques I learned at Convention.   All supplies will be provided including adhesive. Fee:  FREE—Stamp Club Members/Demonstrators; $7—Customers/Guests (FREE when you place a $40 the night of the class)  RSVP today. 

Friday, July 22, 2011

Vintage Birthday


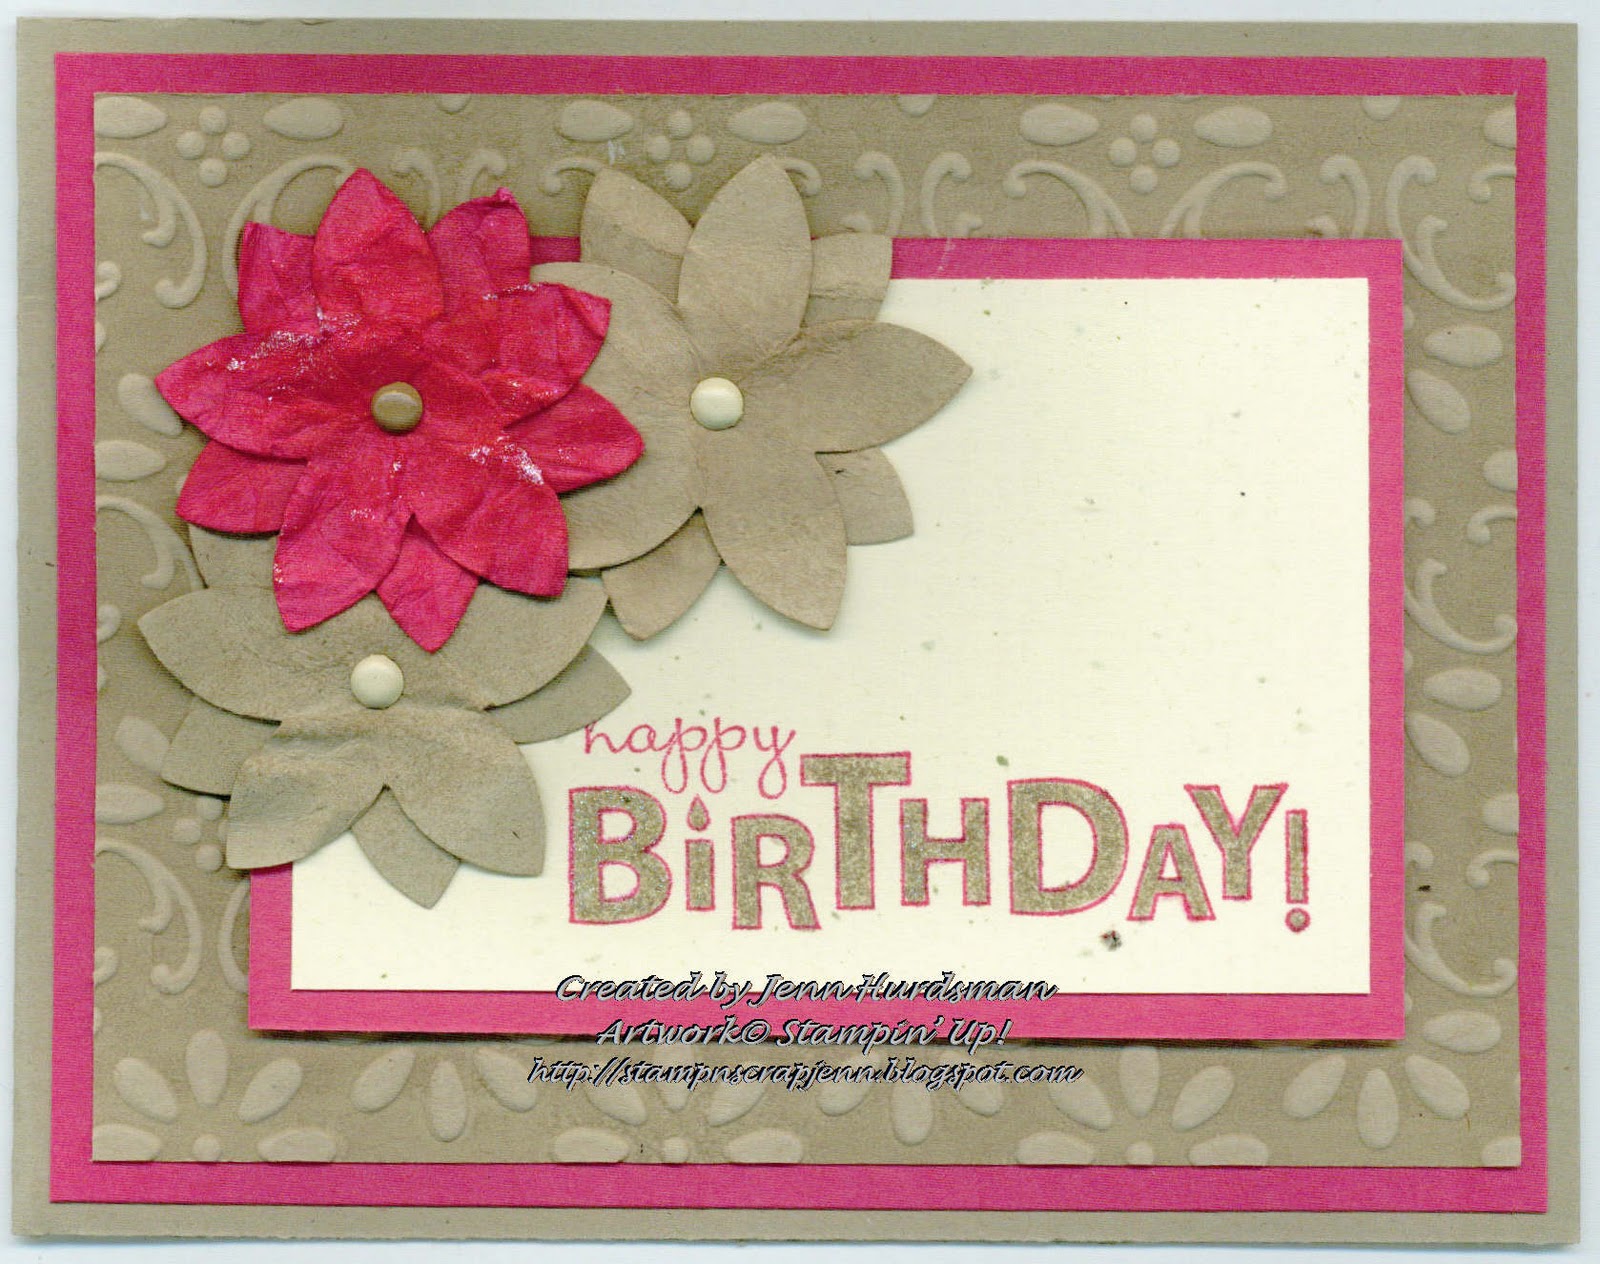
On Monday before I left for Convention, I decided to make 50 of 4 different designs. This is the first design I came up with. It features the faux suede technique. I got some great swaps for this card. Order your supplies here.
Cardstock: Very Vanilla, Crumb Cake
Ink: Crumb Cake
Stamps: Perfect Punches
Accessories: Finial Press Impressions Folder, Big Shot, Brayer, Wide Oval Punch, Dimensionals, Crochet Trim

Tuesday, March 15, 2011

With Love & Caring

My mom called over the weekend to let me know that my uncle's mother-in-law passed away.  I knew that I wanted to send a special sympathy card so I checked out this weekend's sketch here before I sat down to create the card.  I used the "Thanks for Caring" stamp set in the Occasions Mini to create this card.  I love how the butterflies turned out usin the pearl jewels. Order your supplies here.
Cardstock:  Marina Mist, Crumb Cake, Cherry Cobbler, Very Vanilla
Ink:  Marina Mist Crumb Cake, Cherry Cobbler
Stamps:  Thanks for Caring
Accessories:  Big Shot, Vintage Wallpaper Impressions Folder, Brayer, Scallop Square Punch, Dimensionals, AquaPainter, Watercolor Crayons, Smooch Accent Ink Illuminate Top Coat, Pearl Jewels

Saturday, February 12, 2011

Sweet Valentine

When I made this card, I wanted it to be pretty generic so it doesn't have to be used just for your spouse and I also wanted it to be the non-traditional colors.  I first turned to the color coach and chose this color combo.  I decided to use the ghosting techique.  For this techinque, you stamp images in versamark on Glossy cardstock.  Then you emboss the images...for this particular card I chose clear EP because I did want a little of the pink leftover on top of the hearts.  Then you brayer the whole piece of glossy cardstock.  Love the finishing touch of the Pompom Trim.  Happy Valentine's Weekend :) Order your supplies here.
Cardstock:  Elegant Eggplant, Old Olive, Glossy White
Ink:  Melon Mamob, Elegant Eggplant, Versamark
Stamps:  I {Heart} Hearts, Something to Celebrate
Accessories:  Heat Tool, Brayer, Clear Embossing Powder, Melon Mambo Pompom Trim, Tombow Multipurpose Adhesive

Sunday, January 30, 2011

Happy Birthday!

Today is my good friend's birthday.  I met Melissa when we first moved to CA in 2000.  We were instant friends.  Even though she moved to Florida in 2007, we still keep in touch.  She's such a great person, and she's very crafty!  I originally signed up as a demo under her in 2004.  After moving to Florida and dealing with life there, she let go of her demoship but she REJOINED this past summer!  So now I even have more to look forward to at Convention 2011!!!!   Instead of tears of sadness that were shared at Convention 2007...there will be very happy cheers shared!  Can't wait to see you in July! :) Hope you have a fabulous birthday, Melissa...you deserve it!  Order your supplies here.

Cardstock:  Crumb Cake, Melon Mambo, Confetti Cream
Ink:  Crumb Cake, Melon Mambo
Stamps: Bring On the Cake
Accessories:  5-Petal Flower Punch, Dimensionals, Pearlized Smooch Accents Ink, Big Shot, Brayer, Finial Press Impressions Folder, Neutrals Brads, Paper Piercer

Thursday, January 27, 2011

Thinking of You

Over the weekend, we heard of the passing of a friend/mother of our former neighbors where we first lived when we moved here.  This lady was so very sweet.  I don't think I ever saw her without a smile on her face...she was always such a happy person.  We definitely need more people like that in our lives.  This card is for her family.  Order your supplies here.

Cardstock:  Cherry Cobbler, Crumb Cake
Ink: Cherry Cobbler, Crumb Cake Stamps:  Just Believe

Accessories:  Big Shot, Square Lattice Folder, Brayer, Dimensionals, Crochet Trim

Thursday, November 18, 2010

Merry Christmas

This is definitely one of my favorite techniques...ink the inside portion of the embossing folder (top side) with a brayer and run it through the Big Shot!  It's awesome!!  Love the color and the embossing this effect creates :)  Order your supplies here.

Cardstock:  Crumb Cake, Bravo Burgundy
Ink:  Crumb Cake, Bravo Burgundy
Stamps:  All Holidays
Accessories:  Big Shot, Petals-a-Plenty Impressions Folder, Tasteful Trims Die, Wide Oval, Decorative Label Punch, Brayer, dimensionals

Friday, August 6, 2010

Vintage Happy Birthday

After seeing several cards in my Convention swaps with a brayered background with the Impressions Folders, I knew it would be one of the first things I tried once I got home. I was anxious to use this technique with the distressing essentials kit.
Perfect for this month's technique night! Love how this card turned out. So not my usual style, but oh so fun! If you're in stamp club, you received directions on this card. Not in stamp club? I still have openings! You'll be able to attend my technique night every month for FREE. Contact me today for more info. Order your supplies here.
Cardstock: Very Vanilla, Crumb Cake
Ink: Crumb Cake, Tea Stain spot from Distressing kit
Stamps: Perfect Punches
Accessories: Vintage Wallpaper Impressions Folder, Big Shot, Brayer, Pearl Jewel, Distressing Essentials Kit, Crochet Trim Ribbon, Dimensionals

Saturday, June 5, 2010

Striped Announcement


My friend wanted to use the Bridal Speciality Paper for at least one of the announcements since you could make it any color you needed! The announcement would be printed on the vellum overlay before the card is assembled. Both the Bridal Paper and the Gingham Ribbon on this card are retiring...get them before they're gone! Order your supplies here.
Cardstock: Basic Black, Bridal Specialty Paper, Vellum Paper
Ink: Real Red
Accessories: Brayer, Crop-a-dile, Black Gingham Ribbon

Sunday, May 23, 2010

Welcome, Little One


I knew I would love the "Presto Specialty Paper" in the Summer Mini. It's very similar to the Bridal Speciality Paper so I used my brayer to ink up the bottom half of this card to create instant Sage Shadow Designer Paper :)
Order your supplies here.
Cardstock: Sage Shadow & Barely Banana (RETIRING), Whisper White, Presto Specialty DSP
Ink: Sage Shadow & Barely Banana (RETIRING)
Stamps: Nursery Necessities
Accessories: Brayer, Sage Shadow Grosgrain Ribbon, Cutter Kit

Tuesday, December 29, 2009

Snowy Tree


I think the hardest part for me living where we live now is no snow! There are some days I wish I could wake up to a beautiful coating of a white blanket on the ground. This is the last card I made for my friend. They really enjoy snow skiing so I knew this card would be perfect. The tree is stamped on glossy cardstock. After the ink drys, use a white crayon to create "snow" on the tree. Tear a piece of scrap paper and layer on the bottom of the tree to create a "snow bank". Ink brayer with ink and brayer over top of image. Wipe off excess ink and remove scrap paper, and you've created a snowy card. Order your supplies here.
Cardstock: Brocade Blue, Glossy White Cardstock
Ink: Garden Green, Chocolate Chip, Brocade Blue, Gold Encore
Stamps: Lovely as a Tree, Four the Holidays (available until Jan. 4!)
Accessories: Brayer, White Crayon

Saturday, November 28, 2009

Happy Holidays Dove


When I've used the Movers & Shapers die in the past, I've used a piece of 12x6 CS. For this particular card, I wanted a layer with the punch out all the way through the card so I laid a piece of 11 x 4 1/4 CS with a layer of Bride Specialty Paper brayered with Elegant Eggplant attached to it. After I ran it through the Big Shot, I placed a window sheet between the two layers. Such a peaceful holiday card. Order your supplies here.
Cardstock: Handsome Hunter, Bride Specialty Paper, Elegant Eggplant, Window Sheets
Ink: Elegant Eggplant
Stamps: Four the Holidays
Accessories: Big Shot, Movers & Shapers, SU! Holiday Windows, dimensionals, Brayer

Wednesday, November 11, 2009

Striped Happy Birthday...Take Two


I had to try this technique with a light color to see how it worked. It works great! I kept the same layout as yesterday for today's card.
Order your supplies here.
Cardstock: Whisper White, Bride Speciality Paper, Pretty in Pink
Ink: Pretty in Pink, Whisper White
Stamps: All Holidays
Accessories: Brayer, Pretties Kit, Pop-up glue dots, mini glue dots, Eyelet Border Punch

Tuesday, November 10, 2009

Striped Happy Birthday


This is another card created with the bride speciality paper. This piece was brayered with Regal Rose ink.
Order your supplies here.
Cardstock: Whisper White, Regal Rose, Bride Speiality Paper
Ink: Regal Rose
Stamps: Sincere Salutations
Accessories: Eyelet Border Punch, 3/4" circle punch, Pretties Kit, White Gel Pen, Mini glue dots, Pop-up glue dots

Monday, November 9, 2009

Elegant Holiday Greetings


Thursday night at Technique night, we played around with the Bride Speciality Paper. What fun! For this project we brayered red ink over a piece of the paper. What a GORGEOUS card it made!
Order your supplies here.
Cardstock: Whisper White, Bride Speciality Paper
Ink: Real Red
Stamps: Sincere Salutations
Accessories: Organza Ribbon, Pretties Kit, Brayer, Stamp-a-ma-jig

Thursday, September 24, 2009

Thinking of You...


I love this technique of braying ink on the texturz plates and then roll it through the Big Shot! This texturz plate is PERFECT to make it look like you have polka dot designer paper!

All supplies can be purchased here.
Cardstock: Crushed Curry, Very Vanilla
Ink: Crushed Curry, Close to Cocoa
Stamps: Kind & Caring Thoughts (Hostess Level 3)
Accessories: Texturz Plates (SU! Backgrounds 1), Big Shot, Texturz Impressions Pad & Silicone Rubber, Brayer, crop-a-dile, Circle Fire Rhinestone Brad, Chocolate Chip 5/8" Grosgrain Ribbon

Wednesday, June 17, 2009

Brayered Flowers


Jumping on the bandwagon of brayered flowers...although, I used Glossy White CS rather than Shimmery White. Fun technique...give it a try :) Fold Rich Razzleberry CS in half. Attach Melon Mambo CS to card front. Sandwich for Manhattan Flower: Big Shot, Multipurpose Platform (Tab 2), Standard Cutting Pad, Embossing Folder with arrow point into the Big Shot (place Glossy side down for this particular technique), Standard Cutting Pad. Ink brayer with Melon Mambo ink. Brayer most of the ink off on scrap paper then lightly brayer over the flowers…you don’t have to cover the whole flower. Ink the other brayer in Rich Razzleberry ink. Brayer most of the ink off on scrap paper and then brayer on the flowers to complete them. Rub with paper towel if needed to smooth ink out. Attach to card front. Punch scallop oval from Rich Razzleberry CS. Punch large oval from Melon Mambo. Stamp greeting in Melon Mambo ink on Whisper White CS and punch out using small oval. Adhere ovals together and attach with dimensionals.
Card Recipe
Cardstock: Rich Razzleberry, Melon Mambo, Whisper White, Glossy White
Sets: Teeny Tiny Wishes
Ink: Rich Razzleberry, Melon Mambo
Other: Scallop Oval, Lg. Oval, Sm. Oval Punches, Big Shot, Multipurpose Platform, Standard Cutting Pads, Manhattan Flower Embossing Folder, Dimensionals, Brayer

Friday, March 6, 2009

Good Luck Ghosting


One of my favorite techniques is the ghosting technique. I started this card by stamping the greeting in Green Galore on Glossy White Cardstock. Then I stamped the shamrock from "Holiday Blitz" in Versamark randomly on the Glossy CS. I let it dry just a minute or two and then brayered Gable Green across the entire Glossy CS. Wipe off any excess ink with a paper towel and assemble the card! Easy-peasy! Just one more St. Patrick's Day creation to share with you! Have I mentioned that my favorite color is green? Maybe that's why I actually enjoy celebrating with the kids for St. Patrick's Day! :)
Card Recipe: CS: Green Galore, Gable Green, Glossy CS; Ink: Green Galore, Gable Green, Versamark; Stamps: Sincere Salutations, Holiday Blitz; Accessories: Brayer, Green Galore Grosgrain Ribbon (retired)