Tuesday, August 31, 2010

Hostess Gift


This is the hostess gift I made for parties in August. The box topper serves as a Halloween broach as well. Love the accent of the vintage brads. The bat was stamped with the Platinum Shimmer Paint, punched out with the itty bitty bat punch, and brushed with crystal effects. Can't wait to make more of these fun gifts!

The inside was filled with two dozen EMBOSSED napkins.

Isn't the web awesome?!?!? Just a little sneak peek from the Holiday Mini that is available TOMORROW! Last day to order from the summer mini is today. Order your supplies here.
Here is a list of classes for the month of September:
**I plan to do two in-home parties this month! Contact me to schedule fall/Halloween projects with your friends at your home.
**Wednesday, September 1, 10 a.m-1 p.m. Wednesday WOW. Come work on your stampin’ projects with friends. Please bring all of your own consumable products including adhesive. My stampin’ tools will be available for your use. Fee: FREE. RSVP by Tuesday evening.
**Thursday, September 2, 7 p.m. Smooch Pearlized Accent Ink Technique Night. Create two projects with this fun new product. All supplies will be provided including adhesive. Fee: FREE—Stamp Club Members; $7—Customers/Guests (FREE when you place a $40 the night of the class) RSVP by Tuesday evening.
**Tuesday, September 14, 7 p.m. Demo Group Meeting. Join me and other local demonstrators for a night of fun. You’ll create 4 fun projects that will set you on the right track to get your Stampin’ Up! business started. Contact me for more information.
**Friday, September 17, 7 p.m. Décor Accents Design-a-House Stamp Camp. We’ll create two houses (p. 37 of the Holiday mini) and two matching cards at this event. One will be perfect for your Halloween decorations and the other will be all ready for Christmas. All supplies will be provided except SNAIL adhesive. Please bring your own. Fee: $20—Stamp Club Members; $25—Customers & Guests ($5 off when you place a $40 the night of the class). RSVP by Sept. 13 in order to guarantee you’ll have the houses the night of the class.
Want a FREE Greenhouse Gala Craft Tote (a $39.95 value)??? Join Stampin' Up! today! It will arrive with your Starter Kit!

Monday, August 30, 2010

Color Connection Owl Thanks


This is another card created using the same color combination although I used a different DSP for this project. I had to use the new owl punch. It's a fun little guy to put together. Order your supplies here.
Cardstock: Rich Razzleberry, Cajun Craze, Old Olive, Brights Patterns Pack DSP
Stamps: Fabulous Phrases
Accessories: Owl Punch, Platinum Shimmer Paint, Sponge Dauber

Sunday, August 29, 2010

Color Connection Scrapbook Page


Using the same colors from yesterday's project, I created this scrapbook page. I'm finally ready to get some scrapbooking done again. This is from awhile back...2008 to be exact. I can't believe how little my kids look in this picture. They really do grow up quickly! Order your supplies here.
Cardstock: Rich Razzleberry, Cajun Craze, Old Olive, Basic Black, Wicked Specialty DSP
Ink: Rich Razzleberry
Stamps: Teeny Tiny Wishes
Accessories: Color Spritzer, Crimper, 1 3/8", 1 1/4", 1" circles, Itty Bitty Bat Punches, Dimensionals, Uniball Gel Pen, Platinum Shimmer Paint, Sponge Dauber

Saturday, August 28, 2010

Happy Halloween punch happy!


Yes, I know Halloween is almost 2 months away but it's time to start those Halloween projects. This is a make-n-take card for the month of August. My guests this month LOVE punches so I had to do a card with punches. This fun creation came together by using the Wicked Fun Specialty DSP as inspiration. Order your supplies here.
Cardstock: Rich Razzleberry, Old Olive, Cajun Craze, Basic Black, Wicked Fun Specialty DSP
Stamps: Teeny Tiny Wishes
Accessories: Platinum Shimmer Paint, Sponge Dauber, Bitty Bat Punch, 1 3/8", 1 1/4", and 1" circle punches, Distressing Kit, Paper Piercer, Mat Pack, Neutrals Brads

Friday, August 27, 2010

Birthday Again


I told you I needed a bunch of birthday cards in a hurry! The Pink Pirouette was still laying on my desk so I snagged it up with a scrap of Rich Razzleberry. I love the new Pattern Packs of DSP in the family colors. It makes color matching a cinch! I wanted to add a little sparkle to the DSP on this card so I dotted every other dot in every other line with the Pearlized Accent Ink...just enough extra glitter :) Order your supplies here.
Cardstock: Rich Razzleberry, Pink Pirouette, Brights Patterns Pack
Ink: Rich Razzleberry
Stamps: Afterthoughts
Accessories: Pretty in Pink Grosgrain Ribbon, Brights Buttons, Pearlized Accent Ink, tombow multi

Thursday, August 26, 2010

Birthday, Too


Using scraps for the card from yesterday, I quickly put this card together. With the impressions folders, there's not a lot of extras that have to be done with the card! This one was ready in less than 2 minutes and in the mail for a special little girl. Order your supplies here.
Cardstock: Baja Breeze, Pink Pirouette
Ink: Pink Pirouette
Stamps: Afterthoughts
Accessories: Big Shot, Elegant Lines Impressions Folder, Scallop Circle, 1 3/4" Circle Punches, Dimensionals

Wednesday, August 25, 2010

Birthday


I'm all about simple birthday cards! Especially since it seems like I"m always in need of a last minute card. Pulled out the new color coach and got straight to work. Now that's easy!!! Order your supplies here.
Cardstock: Pink Pirouette, Baja Breeze, Early Espresso
Ink: Early Espresso
Stamps: Perfect Punches
Accessories: Wide Oval Punch, Early Espresso Ribbon, Rhinestone Jewels, Big Shot, Square Lattice Folder, Scallop Border Punch

This card is one of the featured cards at August workshops. Schedule your workshop today!

Tuesday, August 24, 2010

Love Birds


This is the card I gave my hubby last weekend for our anniversary. I told myself there was no way I would use this owl punch. Of course once I got AWESOME swaps with it at convention, I HAD to have the punch! Can't wait to play more this fun punch. I saw on Barb's blog how to create a ghost with this punch! I'm going to be so ready for Halloween now!!! :) Order your supplies here.
Cardstock: Marina Mist, Basic Black, Whisper White, Chocolate Chip, Old Olive
Ink: Marina Mist
Stamps: Afterthoughts
Accessories: Owl Punch, 2-step bird punch, Marina Mist Ribbon

Monday, August 23, 2010

Two Hearts


At convention, I got an adorable swap very similar to this wedding card. I had to re-create it for a wedding card we needed to give. So simple...yet so elegant! You can't tell from the scan but the white heart is embossed with the polka dot impressions folder. So fun! This card could easily be adjusted to match the wedding colors. I wasn't sure of the wedding colors so I used gray to resemble silver. Order your supplies here.
Cardstock: Basic Black, Whisper White, Basic Gray
Ink: Basic Black
Stamps: Occasional Quotes
Accessories: Full Heart, Big Shot, Polka Dot Impressions Folder, Basic Black Grosgrain Ribbon, Mini Glue Dot, Pinking Hearts Border Punch

Sunday, August 22, 2010

Baby Boy


I also needed a baby boy card so I came up with the card. I love this new Baby Tees wheel. It's so fun to watercolor :) Order your supplies here.
Cardstock: Bashful Blue, Certainly Celery, Confetti Cream
Ink: Basic Gray, Bashful Blue
Stamps: Fundamental Phrases
Accessories: Watercolor Crayons, Aquapainter, Scallop Border Punch

Saturday, August 21, 2010

Baby Girl


Another requested card...baby girl card. I couldn't find the right stamp set I wanted to use so I created this card with the Big Shot and other cardstock scraps that were on my desk from yesterday's creation. Order your supplies here.
Cardstock: Blushing Bride, Whisper White
Accessories: Big Shot, Timeless Type Junior Alphabet, Scallop Edge Border punch, Blushing Bride Stitched-poly ribbon

Friday, August 20, 2010

Here Comes the Bride


Another request for a specific card. So of course I used Ellen Kemper's blog for inspiration for this FABULOUS wedding shower card. This card actually came together very quickly. I love the fun style and will definitely make this card again! Very fitting to post this card on our 11th wedding anniversary! Love you, honey! Order your supplies here.
Cardstock: Whisper White, Blushing Bride, Old Olive, Very Vanilla, Chocolate Chip
Accessories: White Organza Ribbon, White Gel Pen, Big Shot, Polka Dot, Square Lattice, Finial Press Impressions Folders, crop-a-dile, crimper, Punches: Heart-to-Heart (hat), Itty Bitty Punches (bouquet), Small Oval (arms, back), Large Oval(hat, arms), Butterfly (dress), Scallop Oval (Hair), 2 step bird (bouquet)

Thursday, August 19, 2010

Here for you


One of my favorite techniques we learned at convention was how to make this adorable flower from our satin ribbon. I love using the Big Shot to cut out the Sticky Sheet circle as well as the cardstock backing...perfect match! The Craft & Paper scissors make this ribbon a cinch to cut and round the edges. I see many uses for this particular flower :) A little emboss resist technique was used for the background behind the flower. Order your supplies here.
Cardstock: Whisper White
Ink: Versamark, Melon Mambo
Stamps: Baroque Motifs, Occasionals Quotes
Accessories: White Embossing Powder, Heat Tool, Sticky Sheets, Paper Piercer, Circles #2 Die, Clear Rhinestone circle brads, sponge

Wednesday, August 18, 2010

Aluminum Flashing and Fleurette Flower


Ta-da! Here's the fourth flower. This was the technique I was so anxious to try. The aluminum flashing can be embossed with the Impressions Folders! How AWESOME is that!?!? I loved it! I saw this as a brooch but I thought it would work just as well on a card. Order your supplies here.
Cardstock: Elegant Eggplant, Basic Gray
Stamps: Fabulous Phrases
Accessories: Big Shot, Flower Folds, Fleurette, Rhinestone Brad, Dimensionals, Finail Press Impressions Folder, AquaPainter, Stampin' Pastels, Aluminum Flashing

Tuesday, August 17, 2010

Aluminum Flashing Candle Holder


One of the coolest things I saw at convention was flowers made out of aluminum flashing. It was on the top of my MUST do list when I got home. My hubby didn't complain too much when he got a new pair of tin snips out of the deal :) These are SO easy to make. I cut the aluminum flashing into 12" strips, placed it on top of the Flower Folds die and then added a shim on top of the cutting pad. Three of the four flowers were used for this fun little project. I just hot glued the flowers together. Tomorrow you'll see the card I created with the fourth flower :) Order your supplies here.
Accessories: Big Shot, Flower Folds

Monday, August 16, 2010

Paisley Prints Pumpkin Card


Last make-n-take from convention. It really is fun to have all the supplies cut, designed, and ready to go for you to create :) Even if every piece isn't my style, at least it gets me thinking creatively. The pumpkin is one of my favorite stamps from this stamp set...so cute! I inked the pumpkin and then dabbed on the markers to create the other colors on the pumpkin. Order your supplies here.
Cardstock: Old Olive, Whisper White
Ink: Peach Parfait, Versamark Pad, Cajun Craze, Old Olive, Peach Parfait
Stamps: Just Believe, Paisley Prints, Paisley Party Wheel
Accessories: Pumpkin Pie Grosgrain Ribbon, Linen Thread, Brights Designer Buttons, Dimensionals, Mini Glue Dots,

Sunday, August 15, 2010

Paisley Prints Heart Card


Here's a little sneak peek from the Holiday Mini using the Paisley Prints stamp set :) This card does make me want to use the mini jewelry tag punch more and make CUTE little teeny linen thread bows. Order your supplies here.
Cardstock: Soft Suede, Pear Pizzazz, Pretty in Pink, Whisper White, Peach Parfait
Ink: Pear Pizzazz, Versamark, Early Espresso Marker
Stamps: So Many Thanks, Paisley Prints
Accessories: Linen Thread, Pearl Basic Jewels, Dimensionals, Mini glue dots, Paper Piercer, Mat Pack, Full Heart Punch, Jewelry Tag punch, Itty Bitty shapes punch pack

Saturday, August 14, 2010

Some Things Have to Be Believed Card

This card was a fun reminder to use shading in the background. This circle was created using the Big Shot Die...Circles #2 as a template. Order your supplies here.
Cardstock: Whisper White
Ink: Daffodil Delight, Early Espresso, Peach Parfait, Pear Pizzazz
Stamps: Just Believe
Accessories: Big Shot, Circles #2 Die, Sponges

Friday, August 13, 2010

Thanks So Much Card Pocket


These would be another fun little gift. Can you ever REALLY have enough thank you cards? I love the colors used on this project. I love this single stamp Lots of uses when used with markers. Order your supplies
Cardstock: Daffodil Delight, Marina Mist, Real Red, Whisper White, Brights Patterns DSP
Ink: Daffodil Delight, Early Espresso, Marina Mist, Real Red Markers
Stamps: So Many Thanks
Accessories: Mini Square Whisper White Envelopes, Small Open-End WW Envelopes, Daffodil Delight grosgrain ribbon, dimensionals, 1 1/4" circle punch

ETA...okay, sorry about the pic not showing and then the wrong picture...the right one is finally up :)

Thursday, August 12, 2010

Just for You Pouch and mini cards


This was a fun little project. These would make cute tags or little love notes to leave around. The mini cards fit inside a cello bag inside the pouch. Fun little gift. Order your supplies here.
Cardstock: Pear Pizzazz, Daffodil Delight, Peach Parfait, Whisper White
Ink: Daffodil Delight, Early Espresso, Peach Parfait, Pear Pizzazz, Versamark
Stamps: Just Believe
Accessories: Small cello bag, Chocolate Chip striped grosgrain, linene thread, paper piercer, mat pack, jewelry tag punch, word window punch, 1 1/4" circle punch, stapler

Wednesday, August 11, 2010

Watercolor Flowers


I'm going to take the next week to show you our make-n-takes from Convention. This one was my favorite card we made. The flowers are colored with markers and then spritzed with a water bottle before being stamped down. Love this card??? Make a similar card at Friday's stamp camp :) Order your supplies here.
Cardstock: Bashful Blue, Not Quite Navy, Watercolor Paper
Ink: Bashful Blue, Not Quite Navy, Old Olive, Pear Pizzazz
Stamps: Just Believe (LOVE this stamp set...so glad I got it FREE at convention!)
Accessories: Certainly Celery Satin Ribbon, linen Thread, Brights Designer buttons, mini glue dots, Color Spritzer, spray bottle

Tuesday, August 10, 2010

Thanks Leaf


I wanted to try the distressing essentials kit on DSP so I came up with this swap card for my demo meeting tonight. Pretty fun to use! Order your supplies here.
Cardstock: Pear Pizzazz, Early Espresso, Newspaper Print DSP
Ink: Very Vanilla Craft, Tea Stain ink spot
Stamps: Fabulous Phrases
Accessories: Big Shot, Leaves #2, Polka Dot Impressions Folder, Pear Pizzazz Stitched Poly Ribbon

Monday, August 9, 2010

Thank You Distressed Flower


Another project from technique night. The flowers are punched out, spritzed with water, scrunched up, and distressed with the distressing tools. Order your supplies here.
Cardstock: Not Quite Navy, Marina Mist CS & DSP, Whisper White
Sets: Occasional Quotes, Confetti
Inks: Not Quite Navy, Marina Mist
Other: 5-Petal Flower, Paper Piercer, Mat Pack, Distressing Essentials Kit, Vintage Trinkets

Saturday, August 7, 2010

Flower Power Party


Join me for a flower power party Friday, Aug. 13, at 7 p.m.! ! We'll be creating 8 projects all using flower techinques. We'll be making 4 cards, 3 brooches/barrettes, and 1 candle holder. You won't want to miss these techniques that will give all of your flower projects a boost! RSVP by Wed., Aug.11. Cost: $20--Stamp Club Members; $25--Customers/Guests.

Friday, August 6, 2010

Vintage Happy Birthday

After seeing several cards in my Convention swaps with a brayered background with the Impressions Folders, I knew it would be one of the first things I tried once I got home. I was anxious to use this technique with the distressing essentials kit.
Perfect for this month's technique night! Love how this card turned out. So not my usual style, but oh so fun! If you're in stamp club, you received directions on this card. Not in stamp club? I still have openings! You'll be able to attend my technique night every month for FREE. Contact me today for more info. Order your supplies here.
Cardstock: Very Vanilla, Crumb Cake
Ink: Crumb Cake, Tea Stain spot from Distressing kit
Stamps: Perfect Punches
Accessories: Vintage Wallpaper Impressions Folder, Big Shot, Brayer, Pearl Jewel, Distressing Essentials Kit, Crochet Trim Ribbon, Dimensionals

Thursday, August 5, 2010

Sweet Shoppe

One of my favorite displays at Convention...the Sweet Shoppe!

Seriously, can you believe this is all paper crafting?!?!? AMAZING! How many products from the catalog would you need to create this tray of goodies?

Wednesday, August 4, 2010

Convention!

July 21-24 was the annual Convention in SLC. It was a much needed get away from it all. Since I got a new recruit (yeah, Melissa!!!) the week before, I got to enter in the VIP entrance for Memento Mall. The only downside...it didn't matter! There wasn't a line.

One of the highlights is seeing stampin' friends that you haven't seen in awhile. Megan is a friend I met at the Convention in Denver 3 years ago...the year I took Sydney with me. It's always so fun to see her...she's so fun! MJ is a demo that I know from my group meetings...she's one of my side-line demos. Cula is one of my downline. So glad I got to spend convention this year with these three! Here we are at the Home Office.

I never tire of seeing it. It's such a beautiful building and has such a comfortable feeling.

On Thursday, Megan and I both walked on stage. I walked for being a demo for 5 years. Megan walked for being a demo for 10 years.
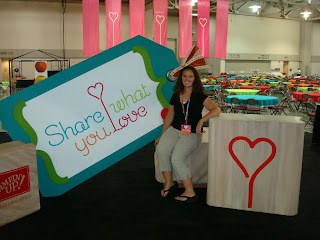
My goal for Convention next year is to walk on stage for having $100,000 in career sales. I'm right on track so far :) I loved the giant rubber stamps they had avaible for us to take pics with this year. So fun!


Friday night we ate at the Joseph Smith Memorial Building. It was such delicious food. Megan and I walked around Temple Square after dinner admiring the flowers and the beautiful sites.

This was our seats every day except the first day...front row left side! :) Perfect for pictures of the big screen.

Who doesn't love free product? Certainly 2700 demos do!!!! We all got this package set...all up coming products in the Holiday Mini!

Can't wait until Convention 2011!!!

Tuesday, August 3, 2010

Merry Christmas Swap


I decided to do one last swap card before I went to convention. I had taken a few supplies with me and this is what I came up with. I only made 50 of these cards and they went very quickly. I love the accent the Smooch Accent Ink added to this card. Order your supplies here.
Cardstock: Crumb Cake, Always Artichoke, Cherry Cobbler
Ink: Crumb Cake, Always Artichoke, Cherry Cobbler
Stamps: Season of Joy
Accessories: Gold Smooch Accent Ink, Crochet Trim
The next few days or so I'll be sharing pics from convention!

Sunday, August 1, 2010

August Newsletter!

Hi Stampers!

Can’t believe it’s already August…and my vacations are finally over. Convention was amazing as ALWAYS!!! Can’t wait to see you again so I can share new creations with you.

Thursday, August 5, at 7 p.m. is Technique Night. We’ll be learning techniques with the new distressing kit in the catalog. We’ll be creating two vintage style cards. Cost: FREE—Stamp Club Members; $7—Customers/Guests

Friday, August 13, at 7 p.m. is a Flower Power Stamp Camp. We’ll be creating eight projects with flowers. Convention was filled with ideas for fun new flowers. Most of these projects will be used for multiple projects…cards, 3-d projects, etc. Cost: $20—Stamp Club Members; $25—Customers/Guests

There will be no Wednesday WOW until September.

Host a party in the month of August to receive extra hostess benefits. When your party totals $350 or more, you’ll receive an extra $25 is hostess benefits! Who doesn’t want more FREE products??? My August calendar is filling quickly so contact me soon to book your party.