Saturday, October 31, 2009

BOO!


This project has been floating around in my mind for a few weeks. A friend asked to borrow my alpha Big Shot dies so I decided I better cut out these letters before I borrowed them to her. Well, I actually ended up looking through my retired chipboard letters first and found the needed letters for this project. I decided to use retired designer series paper as well for this project. I had planned to use the crystal effects and reinker technique w/ glitter but when I was doing the project, I had an idea to mix in champagne mist shimmer paint with the mixture and see what happened.

The letters are sparkly! For the scallops I wanted to be sure they were good and sturdy so I also cut out a scallop from light cardboard to glue the designer paper to. I really like how this project turned out, and it's a great addition to our front door. I'm already starting to think about ideas for Thanksgiving and Christmas...even New Year's and Valentines...oh, boy, the list goes on...with this same idea :) Can't wait to get back my letter dies so I can play. Happy Halloween!!!
Order your supplies here.
Cardstock: Pumpkin Pie, Basic Black, Creepy Crawly DSP (retired), light cardboard
Ink: Basic Black
Stamps:
Accessories: Big Shot, Scallop Circles #2, Pumpkin Pie Grosgrain Ribbon, Black Gingham Ribbon, Dimensionals, Crystal Effects, Champagne Mist Shimmer Paint, On Board Simon Upper(retired)

Friday, October 30, 2009

Baby Elephant


Our friend is going to soon have her fourth baby. This was her card for her baby shower. The elephant is stamped in Pretty in Pink craft ink and then heated with the heat tool. When you stamp light craft colors on dark colors, you heat them to make them pop! I love how it looks...it's much brighter than this picture in person.
Order your supplies here.
Cardstock: Pretty in Pink, Whisper White, Basic Black
Ink: Pretty in Pink craft
Stamps: Animal Stories, Nursery Necessities
Accessories: 1/2" Striped Pretty in Pink Grosgrain Ribbon, Filigree Designer Brads, Soft Subtles Brads

Thursday, October 29, 2009

Ghosted Circles


This technique is called ghosting. I had the Circle Circus stamps on my desk and remembered this technique...so I had to give it a try :) I love how it turned out! This card is for my friend's birthday. To ghost stamp ink your stamp in versamark and then stamp on Glossy White cardstock. (To get a whiter stamp image, clear emboss or emboss with white embossing powder.) Let dry just a bit if you don't emboss. Ink up a brayer with your desired color and roll over the stamped image. Buff with a paper towel.
Order your supplies here.
Cardstock: Rich Razzleberry, Glossy White, Whisper White
Ink: Rich Razzleberry, Versamark, Whisper White craft ink
Stamps: Circle Circus, All Holidays
Accessories: Rich Razzleberry Polka Dot Grosgrain Ribbon, Eyelet Border Punch, Brayer

Wednesday, October 28, 2009

Birthday Circles


Continuing on with the October family birthdays. This was a fun card to put together with the circles. I had to add shimmer mist to the Circles and the Basic Black CS to spice up the card!
Order your supplies here.
Cardstock: Elegant Eggplant, Basic Black, Whisper White
Ink: Elegant Eggplant
Stamps: Circle Circus, All Holidays
Accessories: Ribbon Originals (Elegant Eggplant), Champagne Mist, Rubbing Alcohol

Tuesday, October 27, 2009

November Classes...RSVP today!

Wednesday WOWs, November 4 and 18 between 10 a.m. and 1 p.m. Come and stamp with me and work on any project you choose. Please bring all of your own projects. Fee: FREE. RSVP by the Monday before each class.

Technique Night, Thursday, November 5, at 7 p.m. We'll be focusing on the new speciality papers and the wood sheets. We'll be creating 2 projects at this event. All supplies will be provided. Fee: FREE for Stamp Club Members/$7 for Customers & Guests. RSVP by Monday, Nov. 2.

6x6 Desktop Calendar Class, Friday, November 6, at 6 p.m. Create a beautiful calendar for the coming year...perfect for your desk, your home, or as a gift. At the end of the year, your calendar makes a 6x6 scrapbook. All supplies provided including the calendar and a Basic Black Journaler EXCEPT adhesive. Please bring your own. Fee: $30 for Stamp Club Members/$35 for Customers & Guests...each additional calendar is $30. RSVP by Friday, Oct. 30, so enough calendars/markers are ordered.

Holiday Cards Stamp-a-Stack, Saturday, November 21, 1-4 p.m. OR 7-10 p.m. Create 10 fabulous holiday cards from 15 card designs. All supplies provided EXCEPT adhesive. Please bring your own. Fee: $20 for Stamp Club Members/$25 for Customers & Guests...each additional card will be $2. RSVP by Friday, November 13. Each class is limited to 10 guests...please let me know what time you'll be attending. (This class could also be done during the Wednesday WOW on Nov. 18 from 10 a.m.-1 p.m.)

Book your in-home holiday card party today! We'll create 3 holiday cards at your home (or my home if you prefer) with your friends. When you and your friends place orders totaling $250 or more and you'll get to choose any one item (except My Digital Studio) from the 2009 Holiday Mini Catalog for only $10! If the orders total $400, you get My Digital Studio for 50 percent off the retail price...only $39.97 when you use your free hostess dollars!

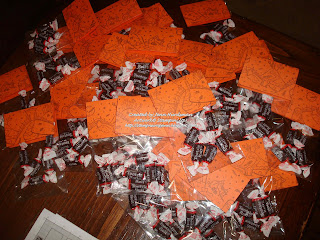
Halloween Treats


Sydney needed some treats to pass out at preschool this week so I whipped these babies up within 20 minutes :)

Order your supplies here.
Cardstock: Only Orange (measures 4"x3" and then scored at 2"_
Ink: Basic Black
Stamps: Haunting Hill
Accessories: Small Cello Bags, Stapler

Monday, October 26, 2009

Soccer Snack Bags


Yup...even the snack bags don't escape the stamps! :)

Order your supplies here.
Cardstock:
Ink: Ballet Blue
Stamps: Just Soccer
Accessories: Paper Lunch Bags

Sunday, October 25, 2009

Pumpkin Family


I'm having great fun creating Halloween cards...can't get enough of these pumpkin families :)
Order your supplies here.
Cardstock: Basic Black, Only Orange, Whisper White
Ink: Only Orange, Basic Black, Close to Cocoa, Old Olive
Stamps: Pumpkin Patch
Accessories: Black Gingham Ribbon, 1" circle punch, Dimensionals

Saturday, October 24, 2009

Celebrate


The idea for this masculine birthday card came from the catalog on p. 194. Emily had some DSP she wanted to use from the previous catalog. I think this card came together very nicely. I like how the punches work together to compliment each other. I love using the catalog as an IDEA book!
Order your supplies here.
Cardstock: Blue Bayou (retired), Old Olive, Basic Gray, Whisper White, Oasis DSP (retired)
Ink: Blue Bayou (retired)
Stamps: Fundamental Phrases
Accessories: Designer Buttons (retired), White Gel Pen, Mini Glue Dot, Curly Label punch, Modern Label punch

Friday, October 23, 2009

More Glittery Flowers


Yesterday Emily came over to create some more birthday cards. She wanted to do more glittery flower cards so we came up with this card. I really like how this turned out with the eyelet border punch.
Order your supplies here.
Cardstock: Cameo Coral, Whisper White
Ink: Cameo Coral
Stamps: Hugs & Wishes
Accessories: Pretties Kit, Pop up Glue Dot, Mini Glue Dot, Eyelet Border Punch, Crystal Effects, Fine Supernova Glitter

Thursday, October 22, 2009

Pumpkin Family

While we were away on our cruise (yes, we had an AWESOME time...check out the mommy moments blog for more details if you like), the kids made us these cute Halloween cards :) I tell ya, my kids know exactly what I like!

J.R.'s creation

Sierra's creation

Sydney's creation
Each one was so precious to me...especially with their very thoughtful writing inside each card. I actually stamped yesterday and made this fun card to send out from us for Halloween...perfect with five little pumpkins.

Order your supplies here.
Cardstock: Only Orange, Basic Black, Whisper White
Ink: Only Orange, Close to Cocoa, Old Olive, Basic Black
Stamps: Pumpkin Patch
Accessories: Dimensionals, 1" circle punch (love to punch out the circle pumpkin and pop it up!)

Wednesday, October 21, 2009

Ornament Card


Christina's creation is perfect for the holidays. Such a simple card (very quick and easy to duplicate) but very detailed. You can make this card at the November Stamp Camp. Order your supplies here.

Tuesday, October 20, 2009

Leaves


Tammy had us create her fun fall card. I like her use of the Designer Series paper under the stamped leaves. Order your supplies here.

Monday, October 19, 2009

Pumpkins


Trenna's card is a fun-loving Halloween card! I especially love her extra detail to the grass she added for the pumpkins. Order your supplies here.

Sunday, October 18, 2009

Give Thanks


Michelle captured the fall spirit with this "give thanks" card. I love the die cut leaf she added. I liked it so much...I now own the Leaves #2 die for the Big Shot!Order your supplies here.

Saturday, October 17, 2009

Merry Christmas


MJ did beautifully on this swap card. You can see the texture she added to the top piece of Very Vanilla in the picture but it's absolutely stunning in person.
Order your supplies here.

Friday, October 16, 2009

Haunting

Jane used the "Haunting" wheel perfectly on this card. Such a festive Halloween card!
Order your supplies here.

Thursday, October 15, 2009

Fall Vases


I love the colors this artist chose. I also really like the watercoloring on the stamped image. Perfect for this fall colored card!
Order your supplies here.

Wednesday, October 14, 2009

Pumpkin Card


At last week's demo meeting, we swapped fall/winter themed cards. I love getting swaps because they always inspire me to try something new. This card was made by a lady in our Inkin' Empire group although I'm not exactly sure which one because it doesn't have a name on it.Order your supplies here.

Tuesday, October 13, 2009

Birthday Sunflower


As I've been showing these fun treat cups, I've had several of you ask me how someone can get to the candy without tearing apart the fabulous card. Well, my dears, here's the answer....a pull tab!

I first punched the 1 3/4" circle through the card front, attached the treat cup, decorated the front, and added a pocket with a 1 3/4" circle punched out on the inside leaving one end without adhesive. Then I just slipped in a piece of CS over the circle. Ta-da...a pull tab so the card doesn't get destroyed! This card is for my niece's birthday!
Order your supplies here.
Cardstock: Summer Sun, Close to Cocoa, Whisper White
Ink: Summer Sun, Close to Cocoa
Stamps: Hugs & Wishes, Sweet Treats, Calendar Alpha & Numbers
Accessories: Sweet Treat Cups, Tombow Multi, Big Shot, Texturz Plates, Dimensionals, Wide Oval, Sticky Strip, 1 3/4" circle, Candy :)

Monday, October 12, 2009

Season's Greetings Snowflakes


I had the z-fold card on my mind when I made my swap for my demo swap this month. I stamped the snowflake three times...twice in Frosted White and then once in Bashful Blue sponged with Platinum. There wasn't enough sparkle yet so I spritzed the card with Champagne Mist Shimmer Mist.
Order your supplies here.
Cardstock: Kraft, Bashful Blue, Very Vanilla
Ink: Bashful Blue
Stamps: Patterned Pines, Four the Holidays
Accessories: Frosted White, Champagne Mist, and Platinum Shimmer Paints, Big Shot, Top Note Die, Paper Piercer, Clear Rhinestone Brads, Sponge Daubers

Sunday, October 11, 2009

One-Eyed Monster


A friend of ours recently had a monster party so of course we had to give him a card to match! This "scary" one-eyed monster was created by first punching out a scallop circle and then punching it out again with the 1 3/4" circle punch. His legs are made with the word window punch and his shoes with the small oval punch & double rectangle punch. His eye is made with the 3/4" circle, 1/2" circle, and 1/4" circle punches.
Order your supplies here.
Cardstock: Kraft, Yo Yo Yellow, Tempting Turquoise, Whisper White, Basic Black
Ink: Basic Black pad & marker
Stamps: Family Phrases
Accessories: scallop circle, 1 3/4" circle, word window, small oval punch & double rectangle, 3/4" circle, 1/2" circle, and 1/4" circle punches, dimensional

Saturday, October 10, 2009

Birthday Princess


This is another card for a family birthday this month. Our niece has been taking ballet lessons so I thought this ballerina was perfect...especially when I added the crown to her head! To get her cute dress, I just stamped the dress image on DSP, cut it out, and layered over the stamped images. Happy Birthday, Princess E!
Order your supplies here.
Cardstock: Melon Mambo, Bermuda Bay, Razzleberry Lemonade
Ink: Basic Black, Melon Mambo, Blush Blossom
Stamps: All in the Family, Family Accessories, Family Phrases (3 of my FAVORITE stamp sets!!!)
Accessories: 1 3/4" circle and scallop circle punches, paper piercer, mat pack, dimensionals

Friday, October 9, 2009

Lexie


I made my niece Lexie's birth announcements this past week. I made them into z-fold cards. Cut a piece of 8 1/2 x 11 paper at 4 1/4". Turn and score at 2 3/4" and 5 1/2". Welcome, little Lexie!

Order your supplies here.
Cardstock: Pretty in Pink, Chocolate Chip
Ink: Chocolate Chip
Stamps: Jumbo Outline Alphabet, Hearts O' Plenty Wheel, Inside--Bundle of Joy (Retired)
Accessories: Big Shot, Top Note Die, Champagne Mist Shimmer Mist (rubbing alcohol mixed w/ shimmer paint sprayed out in a fine mister bottle, Inside--Heart-to-Heart, Dimensional

Thursday, October 8, 2009

Birthday Train


We're giving my three-year-old nephew a train set so I made this card to complete his gift. I used a train of my son's for inspiration as I created this train.
Order your supplies here.
Cardstock: Basic Gray, Whisper White, Basic Black
Ink: Basic Black, Basic Gray
Stamps: Calendar Alphabet & Numbers, Right on Track
Accessories: Trio Flower Punch (on SALE now!!!), 1/2" circle, 1/4" circle (retired), Paper Cutter (all rectangles and squares were cut w/ the paper cutter)

Wednesday, October 7, 2009

Happy Birthday Flowers


October is the month for birthdays the Hurdsman extended family! We have 3 nieces and 1 nephew with birthdays. I still was in the mood to play with the shimmer paints. I wanted to use this flower designer paper (Tall Tales DSP). I painted the centers of the flowers with the Champagne Shimmer Paint using an aquapainter. I used the excess of the shimmer paint from the inside of the lid so I wouldn't add water to the bottle. I love the glittery effect this added to the flower centers.
Order your supplies here.
Cardstock: Rose Red, Tall Tales DSP
Ink: Rose Red
Stamps: All Holidays
Accessories: Champagne Shimmer Paint, Aquapainter, Mat Pack, Paper Piercer, 5/16" Chocolate Chip Jumbo Brads

Tuesday, October 6, 2009

Pumpkin Treat Holder


I first saw these cute pumpkin treat holders on Kelly's blog. She sent me the directions to this SIMPLE pumpkin box. I thought they would be PERFECT for our Thanksgiving table this year. I'm just going to die-cut the first initial of those at our table this year and add it to the front of the pumpkin.

Order your supplies here.
Cardstock: More Mustard, Chocolate Chip, Old Olive
Ink: More Mustard
Stamps:
Accessories: Wide Oval Punch, Paper cutter with scoring blade, Sticky Strip, Crimper, Stylus

Monday, October 5, 2009

Shimmery Green


This card will be available to make at our November stamp-a-stack on Nov. 21. How can you not add shimmer to your Christmas cards this year when the shimmer paints are so easy to use? For this card, I used Champagne Mist on a dauber. I first rubbed the dauber in a circular motion all over the Always Artichoke CS to create a shimmery green background. I inked the ornament in Always Artichoke and then daubed on some Champagne Mist and then stamped it on the Whisper White CS. Before adhering the Whisper White piece, I sponged the edges with the dauber that was inked with Always Artichoke and Champagne Mist. I decided to rub the dauber on the ribbon, too. This card was too fun to make...I love all the extra sparkle!
Order your supplies here.
Cardstock: Basic Black, Always Artichoke, Whisper White
Ink: Always Artichoke
Stamps: Delightful Decorations
Accessories: Chamagne Mist, Sponge Dauber, Basic Black Eyelets, Crop-a-dile, Always Artichoke Grosgrain Ribbon

Sunday, October 4, 2009

Shimmery Ornament


Of course, I can't use the shimmer paints without trying a few Christmas cards. On this card I rubbed the Frosted White Shimmer Paint over the Petals-a-Plenty flowers with a sponge in a circular motion. After I stamped the ornament and punched it out, I also sponged Frosted White shimmer paint on it to sparkle. What ornament doesn't sparkle at Christmas? The greeting was stamped using the Platinum Shimmer Paint applied with a sponge dauber to the stamp.

Order your supplies here.
Cardstock: Real Red, Basic Black, Whisper White
Ink: Real Red
Stamps: Delightful Decorations, Teeny Tiny Wishes
Accessories: Big Shot, Textured Impressions Folder Petals-a-Plenty, Ornament Punch, Dimensional, Frosted White & Platinum Shimmer Paints, Sponge, Basic Black Grosgrain

Saturday, October 3, 2009

Happy World Card Making Day!


Today is World Card Making Day! I'm posting a Halloween card that I'll be making more of to send for the upcoming holiday. I used the shimmer mist I talked about yesterday to create the sparkle on the Basic Black CS. I just can't get a good picture of the sparkle...it's so fun in real life! Happy stampin' today. Make a card just for fun today and enjoy the day.

Order your supplies here.
Cardstock: Basic Black, More Mustard
Ink: Whisper White Craft, Basic Black
Stamps: Haunting Hill Jumbo Wheel, Teeny Tiny Wishes
Accessories: More Mustard Grosgrain Ribbon, Jumbo Wheel Handle, Champagne Mist, Rubbing Alcohol, Fine Mister (I used travel-size hairspray bottle)

Friday, October 2, 2009

Sparkly Pumpkins


Last night at technique night we made shimmer mist. The formula is about 10-12 drops of shimmer paint (we used Champagne Mist) in about 1 oz. of rubbing alcohol. I used a travel-size hairspray bottle to store my mixture. Be sure to shake it up well and spray off your project before spraying your project. I also like to put my project in a box and then spray it with the mist so you don't make everything around you sparkly as well. We added sparkle to the Whisper White CS after stamping the pumpkins. When I was testing out this technique, I sprayed it immediately after stamping, and it smeared. So when I stamped it the second time, I let the ink dry a few minutes before spraying it. It didn't smear the second time.


Order your supplies for this card here.
Cardstock: Basic Black, Only Orange, Whisper White, Night and Day DSP
Ink: Only Orange, Close to Cocoa, Old Olive, Whisper White craft
Stamps: Pumpkin Patch
Accessories: 1" circle punch, dimensional, Designer Label Punch, Champagne Mist Shimmer Paint, Rubbing Alcohol, Fine Mister (this was the travel-sized hairspray bottle)

Thursday, October 1, 2009

Deal of the Week...PUNCHES!

Now through August 12 you can purchase three punches at a discount...

109183 Trio Flower punch ONLY $10.99

109041 5-Petal Flower punch ONLY $10.99

110709 My Way punch ONLY $11.99

E-mail me your order or place your order here. Stamp club members can order these punches with their club order this month.

Sparkly Bermuda Bay Cupcakes


Tried the same card as yesterday...just different colors! On this card, I mixed two drops of Champagne Mist shimmer paint with one drop of reinker. (I just mixed them in a lid of an eyelet container.) I stamped the cupcakes in Basic Brown and then added the sparkly ink to the cupcakes with an aquapainter.

Order your supplies for this card here.
Cardstock: Bermuda Bay, Whisper White
Ink: Basic Brown classic pad, Bermuda Bay classic reinker, Chocolate Chip reinker
Stamps: The More the Merrier
Accessories: Corner Rounder Punch, Bermuda Bay Polka Dot Grosgrain Ribbon, Aquapainter, Champagne Mist Shimmer Paint, Lid of eyelet container for mixing